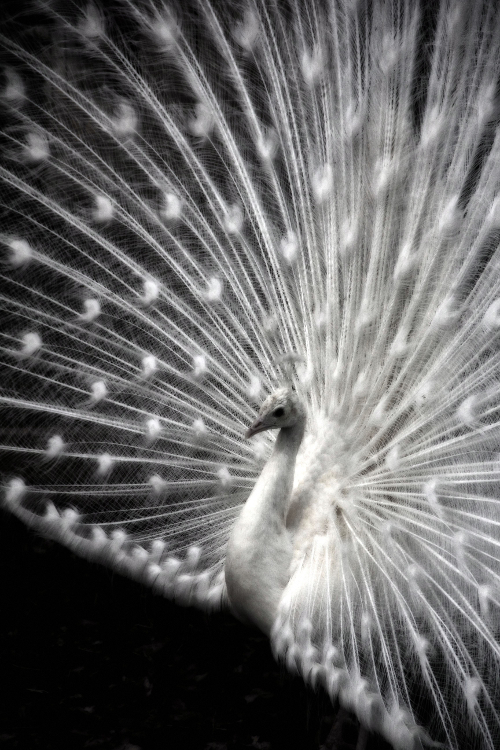
This is the page for our latest project. It was to build a suitable habitat for our adopted White Male Peacock Big Bird and the hens we bought him for companionship. As you can see the temporary cage that he was in was fine for the winter, but once he grew his full train back this spring, he just didn’t have enough space to be happy.
A few before shots… You can see the old run in the back.
The work has begun… Tim has started clearing the path for the new road so that we can get the front end loader back to the site. There was some small scrub brush that had to be removed first.
Then there were 3 small trees that had to come out because they were in the way of the new road. We also made the decision to take out a maple tree that had grown on top of a flat rock. I don’t like to take trees down that I don’t have to, but it’s foundation was shaky at best and we didn’t want there to come a day when we had to worry about it coming down on the new barn and run. We had a clear opening to drop it before construction started, so we did.
The first load of block and 3/4 Modified have been delivered!! The 3/4 Modified we get from the local Quarry, it is the expensive part of this project. The Block behind it is scrap block from the local concrete plant. It is all the scraps that they can’t sell to the public. It is FREE!! Although, we do have to pay a delivery charge, but hey, it’s FREE!! It also makes an amazing foundation. We have a very high water table here and a lot of drainage problems, so any new foundation we put in, we use this and the drainage problems disappear!
These are a few before shots of where the new Peacock habitat will be. This is where the old run sat in the photos at the beginning. As you can see there is a big drainage problem. When we are done, this area will be smooth and level. It’s hard to tell from the photos, but there is actually an almost 18% grade here. At one end of the area, we will need to bring up the level nearly 3 feet with the block, thank goodness it’s FREE!
Laying the block for the road.
With the addition of the 3/4 modified on to, it’s starting to look like a road!
 |
 |
This last picture is looking up at the area where the Peacock habitat will be. |
We will ultimately loose our fire pit to this project. The area where the pit was will become a koi pond. But, for now, we will continue to make use of the space and enjoy the evenings.
The site was far from level. The block will make a sturdy foundation, but the one end of the pad had to be brought up more than 3 feet. That’s A LOT of block!!
Once the pad was finished, we had to connect it to the road with a ramp. The grade had to be gradual enough that the 16 foot barn could be safely moved along it without dragging.
 |
The concrete company ran out of scrap block, so we started scavenging any fill material we could find. A neighbor gave us a couple pickup truck loads full of old concrete blocks. |
 |
 |
 |
Tim makes sure that everything is level every step of the way. |
 |
After the surface of the pad was finished, Tim graded the area between the pool and the pad. |
 |
The site is ready for the new barn to be delivered.
Watch the barn being delivered… It’s a bit long, but it’s amazing how this guy does it.
Constructing the covered runs.
The wire roof is on. There were a few low spots where the wall panels didn’t quite meet the ground, so we are covering the spaces with pavers that will eventually be covered with 3/4 modified to make it all look like it belongs.
Each of the 4 runs (2 large and 2 smaller) have a clear corrugated roof over part of it so that the birds have shelter from bad weather, but no loss of light on sunny days.
In the center of the two large runs, we needed to add support for the wire roof.
 |
The outside is finished! Please ignore the green pool, it has not been a priority yet this year. |
 |
Check out some of the interior construction.
 |
There is a cord on a pulley that is threaded out through the wall so that the inner hatch can be raised and lowered from the outside of the barn. |
 |
The interior is finally finished! Both side of the barn inside are mirror images of each other. As you can see there is a low cage with a hatch for each of the side runs. There is a long platform for birds to get up on and plenty of nesting space underneath. In time, I will put up curtains for nesting privacy.
| All the surfaces are covered with linoleum for ease of cleaning and it is all fastened down with aluminum drywall corners so nothing can get under the edges. |
 |
The barn, as is the run, is divided in half. The inside divider is partially plywood to avoid line of sight arguing by the males, but the upper portion is wire to ensure proper ventilation. |
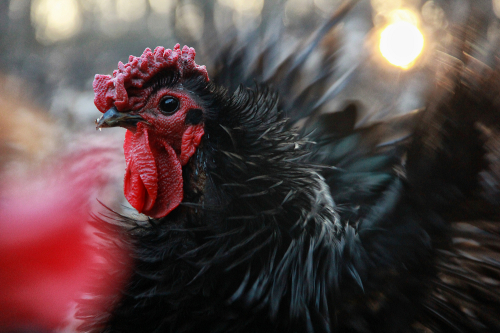
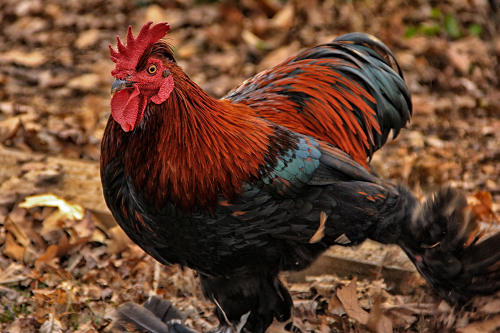
Big Bird has been moved in and is already enjoying the space to really show off for his girls. The girls on the other hand prefer to lounge in the hay.
Jake and Missy are enjoying one of the new side runs. They have access to the barn through a hatch that can be securely closed at night. They are waiting patiently for me to finish taking pictures and fill their wading pool.