Building a Raised Bed
Home » Articles » A Garden City » Building a Raised Bed
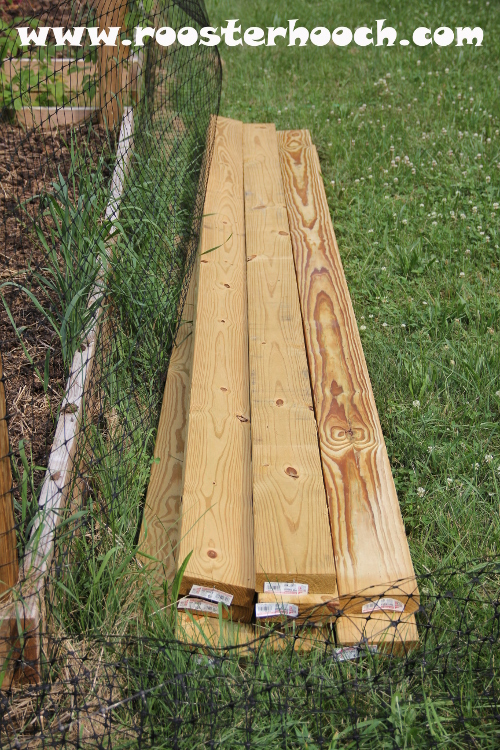
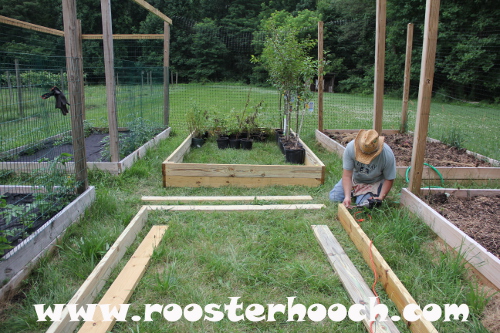
 The raised beds from my garden city are 6 foot x 12 foot beds. I chose these dimensions because space was the least important of the considerations. There was plenty of space at this end of the vineyard for as many beds as I wanted as you can see from the picture to the left. On the other hand the cost of the materials versus the return on the beds from what I can grow is always a factor. Twelve foot 2×6’s were the most cost effective lumber, so I kept the 12 for the long dimension and cut them in half for the short dimension. Each bed requires 6 pieces of 12 foot long 2×6 pressure treated lumber (please don’t feel the need to tell me the evils of pressure treated lumber, I know the facts, have weighed the pros and cons and still feel it is safe for this particular application). The corners require a piece of 4×4, but the length of the 4×4 depends on whether you want corner posts on the garden or if you just simply want a frame.
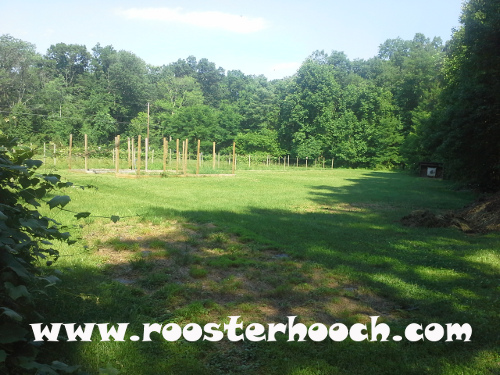
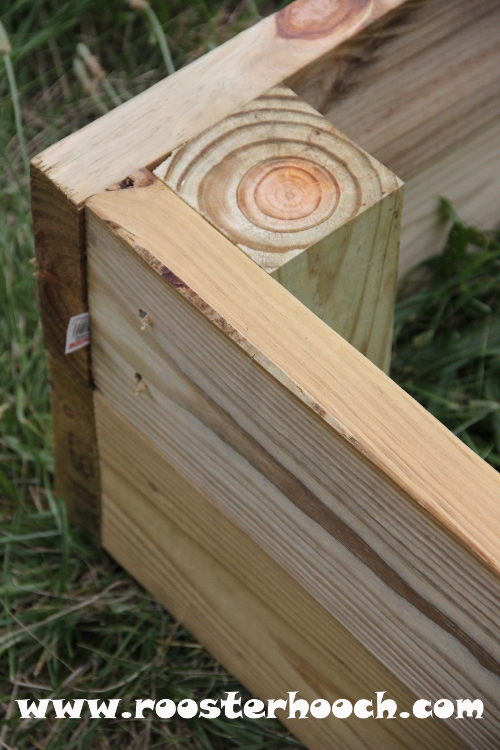 As you can see from the picture to the left, I chose 8 foot 4×4’s for the corners of the outside beds. I did this so that I could put up deer fence around the whole structure to make sure Bambi and his extended family didn’t stop by for a late dinner and clean me out of produce. And for the inside beds, I chose 11 inch 4×4 sections just to join the corners because I didn’t need the tall uprights. For the sake of making this simple, and not because it happens to be the picture that I have to go along with this article (seriously, would I lie about something like that…wink), these directions will assume you need 4 sections of 4×4 that are 11 inches long.
The first order of business is to cut 2 of the 12 foot 2×6’s in half. Since 12 foot lumber is generally a little over 12 foot allowing for the saw kerf in cuts if you cut it straight in half, they will be slightly over 6 feet. You can be OCD about it and cut 2 pieces that are exactly 6 foot each though.
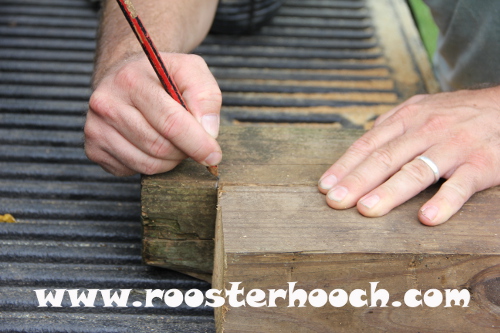
 Then you will need to mark the 4x4s and cut them at 11 inches each. (2×6 lumber is actually 1.5 inches x 5.5 inches, so to accommodate 2 – 2x6s, you need 11 inches).
Once you have all of your lumber cut, it is time to assemble. I would recommend that you have this approximately where you want it when you build it, because this sucker is heavy and moving it is no easy task. With 2 people, shifting it a little in each direction is possible, but it would be a hard thing to carry much of a distance.
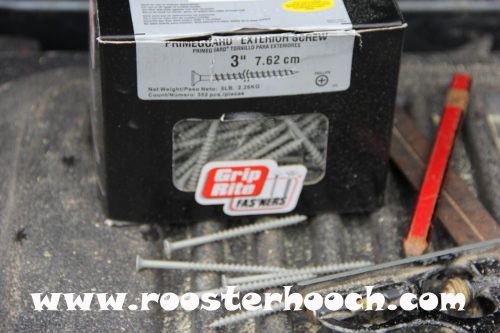
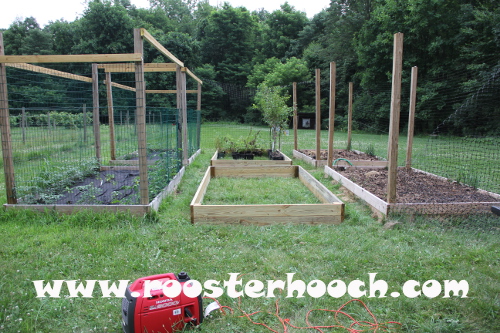
 When we assembled it, we built the bottom layer first using 3″ long exterior grade screws. The long sides went to the outside of the short side and were screwed in from the sides as you can see in the picture to the left.
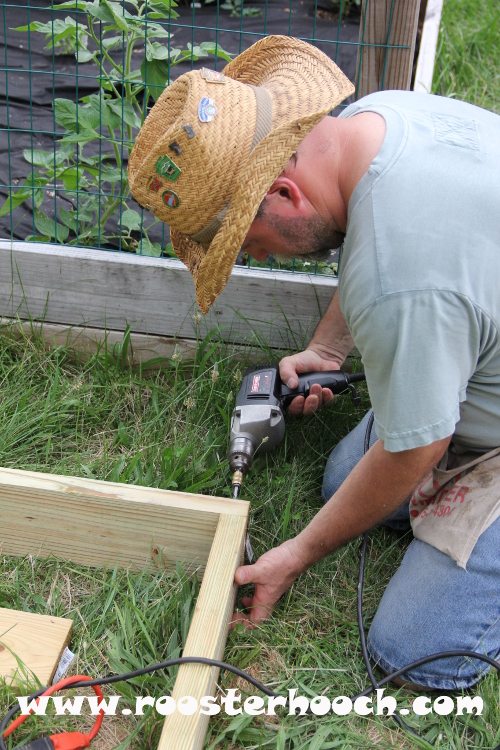
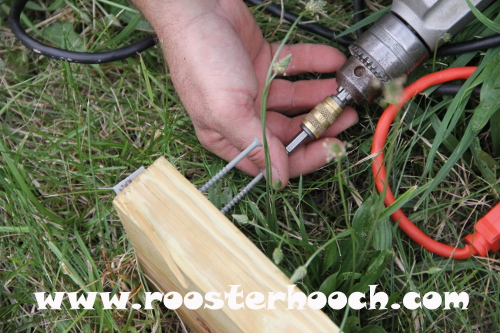 We found it very helpful to start the screws before trying to square up the pieces. That allowed us to get everything exactly where we wanted it and then just drive the screws in, no muss no fuss. Once the all 4 corners of the bottom layer were screwed together, we added the 4x4s in the corners and secured them by putting screws in from both the short and the long side of the box.
 It is not a bad idea to make sure the whole structure is where you want it and square at this point because it will be easier to shift now than when the second layer is on. To check for square on a structure this big, there are a few options, but the one I find the easiest is to take you tape measure and measure from corner to corner diagonally. The dimensions should be the same if the bed is square. Keep in mind though that because of the inherent variations in lumber especially the inevitable warp in a piece as long as 12 feet, it will be nearly impossible to get this perfect. But if it isn’t perfect, chances are it will be your little secret. I highly doubt that is what the Google satellites are out there looking for.
 The second layer is assembled by attaching the lumber to the sections to 4x4s from the outside. This part goes fast because the hard parts are already done. From start to finish, this project took us less than an hour per bed. We did 2 at a time, so it was even a little quicker than that. That, of course, doesn’t include the time assembling tools or shopping for materials. Let me tell you about shopping for materials…
We went to our local home improvement store (I won’t say which one because there is no endorsement deal here). We picked out the pieces of lumber that we wanted, paid and then proceeded to load them in the back of DH’s full size Toyota Tundra. We don’t have the long bed because we have the extended cab, but even with an 8 foot bed, the 12 footers wouldn’t have fit. So we left the tailgate down and racket strapped them in a bundle against the tail gate. We had 12 pieces, so that was 3 layers of 4 pieces side by side. Then we tied our little red plastic safety flag on the end of the piece in the middle. Seemed logical, but anyone with a strong physics background probably already sees where we went wrong. From the parking lot of the home improvement store to our house is less than 5 miles and involves exactly 5 turns. We made the first turn out of the parking lot successfully then came to a stop at the stop sign for the second turn. There was very little traffic, so we easily pulled out and my lead footed DH gets the engine purring right along down the road until we heard this terrible CRASH!!! In the rear view mirrors you could clearly see our pathetic little crumpled flag and half our payload in the middle of the road. DH screeches to a stop and we ran back and tossed the lumber back in the bed all willie nillie and drove about 3 miles an hour til we reached the park entrance about a third of a mile down the road. Fortunately there weren’t any cars close enough behind us to have been hit by the runaway timbers. In the parking lot of the little park, DH jumps back out, runs around behind the truck and exclaims “What happened?! Those racket straps were as tight as I could make them!!” I explained, “Well, DH it’s actually pretty simple and I should have known better. You see, the racket straps are more than sufficient to hold down the lumber on the outer perimeter of the stack. Unfortunately the wood against wood friction is NOT sufficient to keep the wood in the center of the stack from sliding out…rookie mistake…sigh…”